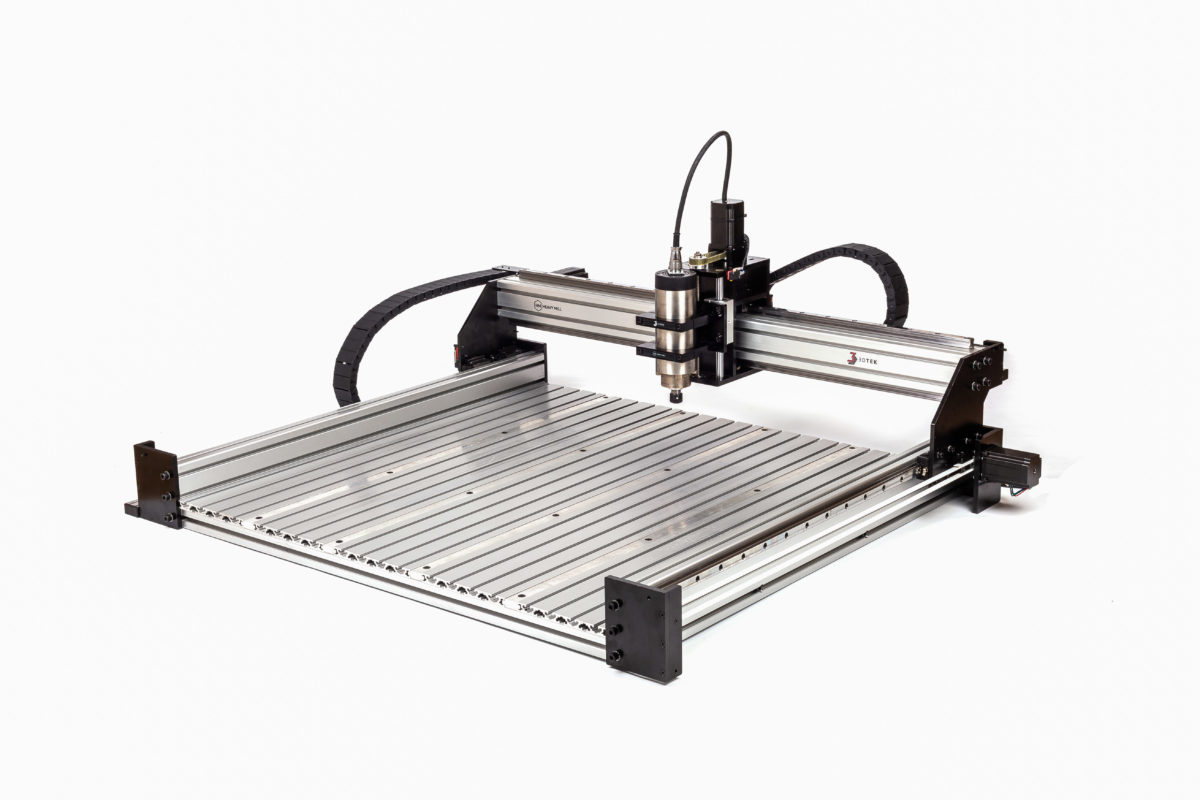
Y End Plate, Pulley Plate, Stepper Plate and Stepper Motor installation.
Notes:
- Idler pulley plates and motor plates also have an extra hole for a screw that holds the drag chain support extrusions, these are installed with the hole at the bottom.
- There are 4 Y end plates, 2 x A-Type & 2 x B-Type. The Differ only in the side that they are countersunk and the placement of the single-threaded hole. The small M5 Tapped hole that is to be positioned towards the top with the countersinks on the outside – as pictured.
- The two A-type install diagonally opposite each other, as do the two B-type plates.
- The front left Y endplate pictured in detail A below is an ‘A-Type’ plate.
Rear Y Plates and Y Stepper Motor Plates
Front Y Plates and Y Pulley Plates
Install Idler Bearings with spacer x 3. (Only 2 required for Y-Axis)
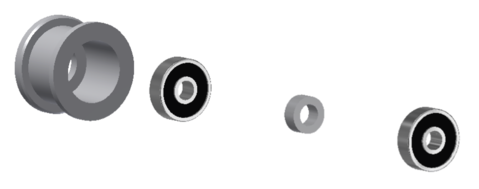
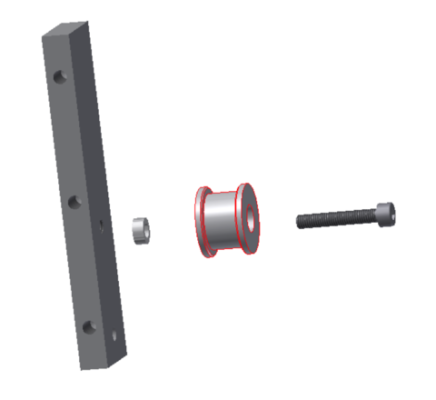
Attach Idler to 2 x Y Idler Pulley Plates using M5x30 BHCS. (Third Idler can be put aside for now)
Notes:
- Do not over tighten M5x20 SFHCS (8)
- The smaller opening of the Idler pulley is oriented towards the head of the M5x30.
X Motor Plate
Notes:
- X Motor requires 20mm SHCS screws, not 25mm as used on Y,Z,&A motors.
- Do not over tighten M5x20 SFHCS.
- Some installations may require substitution for M5x16
- Install motor at a position in slots closest to the centre of the machine.
X Pulley Plate
Notes:
- Do not over tighten M5x20 SFHCS.
- Some installations may require substitution for M5x16
Drag Chain Support Rails
Y Drag Chain Support Rail
X Drag Chain Support Rail
Y Drag Chain Support Brackets
X Drag Chain Support Brackets
Drag Chain:
Notes:
- You will need to break and join your drag chain to get the best length, considering bend radius.
- Ensure when setting the X drag chain length, that the drag chain is not long enough to foul the X idler pulley plate when the X carriage is at this end of its run. Run the gantry and x carriage back and forth a few times to be happy with drag chain lengths before adding any wiring.
- One male and one female drag chain end are required for each section of chain.
- 4 * M4x12 SFHCS / BHCS Secure the drag chain ends to the mounts.
- 4 * M4x8 SFHCS secure the other ends to the drag chain support extrusions using m4 T-Nuts.
Build Video (2x Speed)
Limit Switches
| Parts | Description | QTY |
|---|---|---|
| LMS | Limit Switches | 5 |
| Y-Axis Limit Switches | M3 x 25mm Socket Head Cap Screws | 4 |
| X-Axis Limit Switches | M3 x 25mm Socket Head Cap Screws | 4 |
| Z-Axis Limit Switch | M3 x 16mm Socket Head Cap Screws | 2 |
Notes:
- One limits switch has no lever, this is for the Z-axis – it’s triggered by the pillow block bearing case
- The limit switch mounting holes are now tapped m3 so no washer and nut are required
X & Y Limit Switch Cad Explosion
X Limit Switch Cad Explosion
Limit Switch Build Video
Limit Switch Triggers
The limit switches are fouled by screws inserted into the Y Gantry plates and the Y End Plates. They can be screwed in and out to eventually set the machines home and extent of travel.
Tightening up Y bearings and bearing rails.
The Y-axis bearing rails are to be pulled as high as they can be in the Y rail slots and tightened off. Do not over tighten the bolts, they are only threaded into a thin alloy tee nutbar. There are a lot of these bolts all pulling the Tee nut bar into contact with the inner surface of the t-slot and its this friction which will hold the rail in this place without unnecessary overtightening of these bolts.
Similarly, Pull the gantry high when tightening the bolts in the Y carriage plates bearings. The 8 bolts going into the 2 bearings on each side of the gantry, are to be as low as possible in the slots on the Y carriage plates.
Tightening up X bearings and bearing rails.
Push the X carriage to one side of the machine. Tighten the 8 bearing block bolts in the X Carriage.
When loose, the X-axis bearing rails have some play in the T-slot. They can be moved forward and backwards around 5mm.
Pull the X carriage towards the front of the machine so that it pulls the X bearing rails forward in the t-slot they are secured to. Starting from one end move along the TOP rail (only) securing each screw in the rail. As per the Y bearing rail, no need to over tighten these screws. Keep the X Carriage close and slide it along with you as you move up the X rail. All the while pulling forward on the X Carriage and bearings so that they are positioned towards the front on the machine. Keeping the X carriage close as you move along helps you by having something to pull on to keep the bearing rail in as far forward in its play and also helps to ensure that the rail is being positioned as per the bearings own spacing.
Then work back in the other direction tightening the underside bearing rail screws. Again keeping the carriage close which is all the more important this time. DO NOT pull forward on the carriage, the position of this bottom bearing rail in the t-slot will be set by the bearings in exactly the position that they require.
Install Belt Clamps and Belts
| Parts | Description | 1000mm Qty | 1500mm Qty |
|---|---|---|---|
| BCT | BeltClamp_Top | 3 | 3 |
| BCB | BeltClamp_Bottom | 3 | 3 |
| Belt Clamp Bottom and Stepper Motors | M5 x 25 Button Head Cap Screws | 6 | 6 |
| Belt Clamp Top | M4 x 25mm Socket Head Cap Screws | 6 | 6 |
| Belt | Open Loop Belt – meters | 7.5 | 10 |
| Belt | Closed-loop 275mm T5 Belt | 1 | 1 |
Notes:
- Pull the motors towards in their mounting slots towards the centre of the machine and tighten.
- Leave the top belt clamp top loose with at least 5mm so that you can fit a doubled over belt into it
- Back off the screws holding the pulley so the plate is loose with a good 3-5mm of play in the pulley plate.
- The belt comes in one length, it will need to be cut into 3 pieces, they are not all the same length however simply dividing into equal pieces will do.
- The belt loops around both the motor pulley and the idler pulley. It meets at the belt clamp and crosses with the belt coming from the motor end on top.
- Install the belt with little slack, but not with too much concern for tension, when the pulley plate screws are tightened tension will pull onto the belt.
- The belt loops over its self and is clamped down between the two belt clamps – as per the image below
- Slide the carriage from end to end to ensure that the belt does not try to run off the motor pulley or the idler pulley. The depth that the motor’s pulley is inserted on to the shaft and that the belt is pushed into the clamp may need adjustment. The idler has no adjustment and so will set the standard.
- When retightening the pulley plate take note of the belt tension. It should not be firm when the pulley plate gap is closed back up. Its a bit difficult to measure so a good test is to pull the gantry forward so the front of Y carriage plate is 300mm from the front of the machine then sit a 600g weight (a full 375mm bottle of beer) on the top of the belt in front of the carriage. It should deflect by around 3mm or so. Any tighter and there is a risk of snapping stepper motor shafts, looser and you may end up tightening it later. If you do break something, we will replace it without charge once, with the experience, it wouldn’t happen twice.
- You may need to back off the pulley plate and belt clamp top plate to readjust the belt length/tension several times before being happy.
- The belt clamp top does not need to compress the belt much to gain a very good grip. Don’t overtighten as its difficult to remove later. Always install and remove belt clamp top by turning each screw a little bit at a time. Tightening or loosening one bolt by much more than the other leads to the other getting jammed due to the expanding force of the compressed belt in the clamp. If this happens, squeeze the top and bottom of the clamp together with a pair of plumber’s grips / large set of pliers/vice grips etc, or tap the top plate gently with a hammer.
- Trim the belt back to no more than 20mm extending from each side of the clamp. It’s very difficult to cut due to the metal radials.
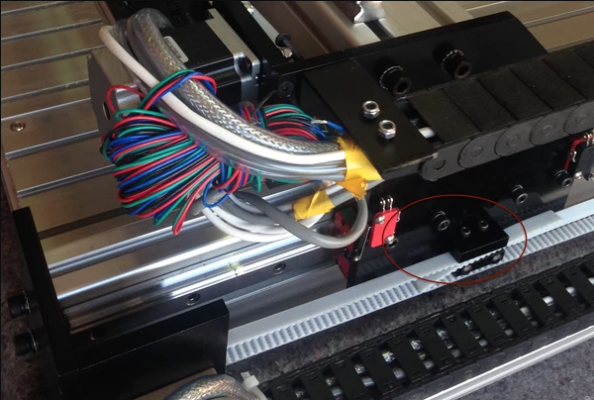
Belt Clamp Cad Explosion.
Belt Clamp and Belt install.
Note – the video below depicts the Z stepper inside the carriage. It is now a larger stepper that sits atop the X-axis, regardless pulling tension onto the Z belt it is done in the same way by drawing back on the Z stepper motor and locking off the 4 bolts holding its mount.
Wiring and Plumbing
| Parts | Description | 1000mm Qty | 1500mm Qty |
|---|---|---|---|
| VFDCbl | Shielded 4 Core VFD Spindle Cable | 5 | 7 |
| Stepper Wire Harness | 4 | 4 | |
| Limit Switch Harness | 3 | 3 | |
| Hose | 5mm Water line hose – water-cooled only | 2x5m | 2x5m |
Notes:
- There are two sets of drag chain. One running with the X-Axis and One Running with the Y.
- All cables running through the X must also travel through Y chain
- You can remove one end of each drag chain and lay it flat to work in cables or more simply remove all the underside clips of the chain and lay through the entire wire bundle as one.
- Avoid drawing wires through if possible as they can wrap around each other – opening all the links and laying cable in works best and enables the removal or repositioning of a single cable if necessary later.
- Tape together each set of 4 motor wires and label at both ends so that they are identifiable later. Do the same with each set of 2 Limit switch wires.
X-Axis Notes:
- Ensure there is enough VFD cable (and for water-cooled enough coolant line) length for the Z-axis to operate. As the Z-axis goes down, it will draw more cable down with it and it must still clear the X-axis and the Z-axis belts and pulleys on the top of the X-axis.
- As the VFD cable exits the drag chain, press it up against the Z stepper motor, into one of the channels on the 4 sides and cable tie it off – this will point the VFD cable vertically upwards from where it will bend 180 over the top of the XZ axis and down to the spindle.
- From the X/Z-axis, all the way back through the X and Y drag chains, the cables required are:
- VFD Cable
- Limit Switch Cable x 3
- Stepper Motor Cable x 4
- Coolant lines if water-cooled
Y-Axis Notes
- The furthest Y cable (away from the Y cable drag chain) runs down the back of the machine in the T slot of the back support 4040 base extrusion.
- All Cables feeding the machine will end up exiting the Y drag chain at the back of the machine. (Other than the two Y motors which never enter the drag chains.)
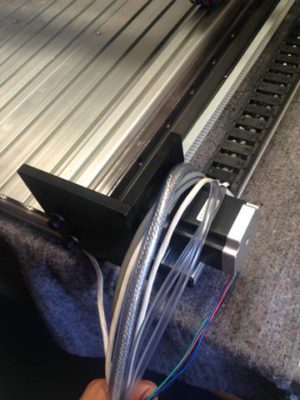
Wiring Video 1
Limit Switch Termination
Notes:
- The limit switches have 3 terminals. Common, Normally Open, Normally Closed
- Generally, we use the common and normally open which are the terminal on the side and the closest terminal to the one on the side.
- Each switch needs two wires, if necessary the common can be shared between any of the switches.
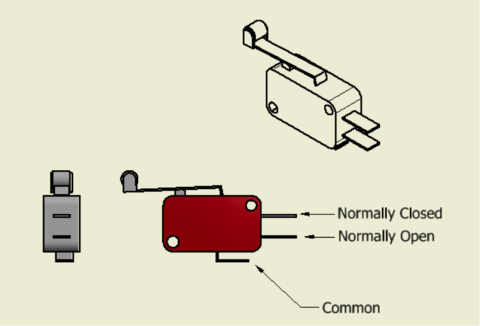
From each switch, one wire goes to the common and one wire to the Normally Open.
Stepper Motors
Notes:
- There are 4 Wires on each stepper motor.
- The Stepper motors have two coils, and two pairs
- If the wires of any one or more pair are touching each other, the motor will act as a brake and be hard to spin by hand. In this way it’s possible to identify the pairs if you touch any two wires together and the motor doesn’t become hard to spin, those two are not a pair. When you find a combination of two wires that when joined make the motor difficult to spin, that’s a pair – and by default, the other two are the second pair.
- The pairs are Red/Blue and Green/Black.
- Once connected – To identify in the mass of wires coming off the machine which wires are for which motor you can short out one of the pairs and see which axis becomes difficult to move, then mark this wire so it can be identified when you come to wiring your controller.
Enclosure Layout
Depending on the electronics options selected there will be different items supplied with the electronics enclosure.
PLEASE NOTE:
There are by necessity several 240V components in this system which are to be commissioned by a licensed electrician.
3DTek cannot stop you from commissioning these parts yourself and hope that you can consider your own and the safety of everyone who may come into contact with this system now and in the future by organising a licensed electrician for what should be 1 to 1.5 hours of time to wire up the system for you.
3Dtek will, by arrangement, be ready and awaiting a call during the time your electrician is booked to ensure that the commissioning does not cost you any more than it has to in tradesman’s fees.
Once complete, there should be no need for frequent access to this enclosure and so please consider locking the control box with the padlock tabs on the enclosure to ensure that inquisitive hands cannot access these items.
All Kits will include:
- Large Plastic Enclosure with hinged lid & metal enclosure + Hardware for mounting
- Neutrik Power input Plug and Socket + Hardware for mounting
- Fan + Mounting Hardware (Please see the sticker on the fan for appropriate supply voltage)
- 2 Fan Filters + Mounting Hardware
- At least one power supply
- ~300mm of Din Rail
- Some cable management – cable ties and sticky mounts
- Cable Glands for cable entry
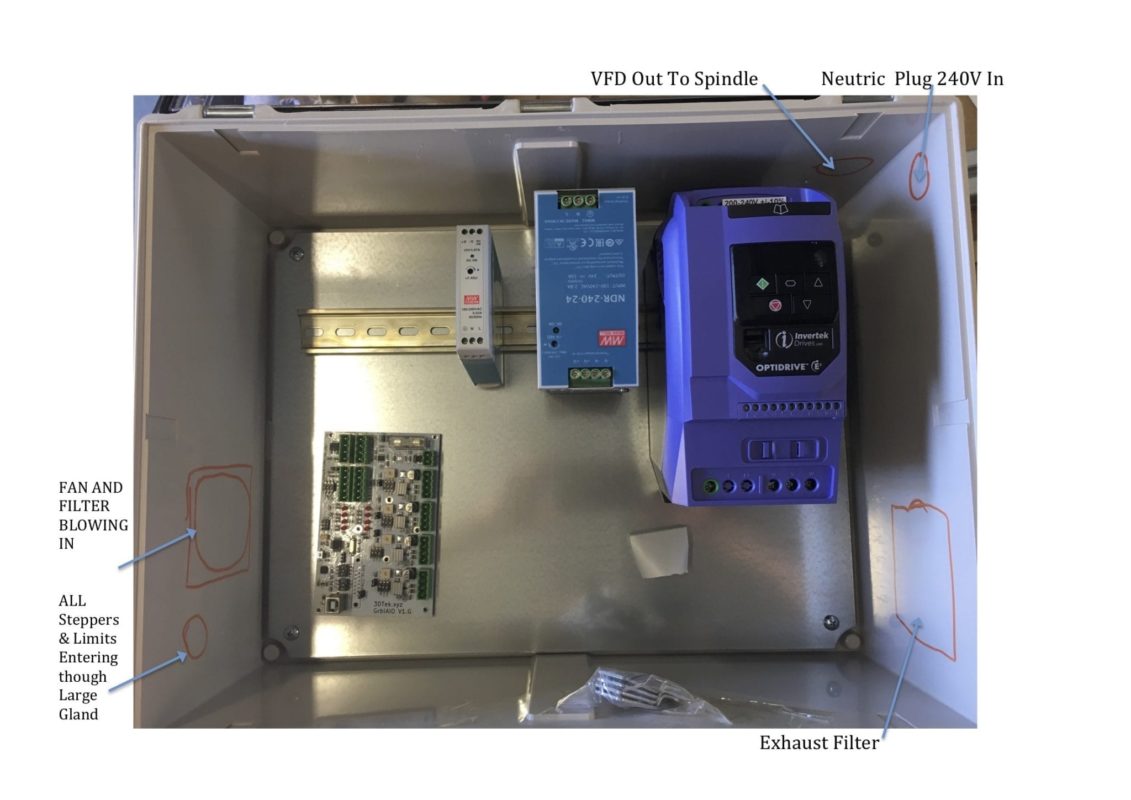
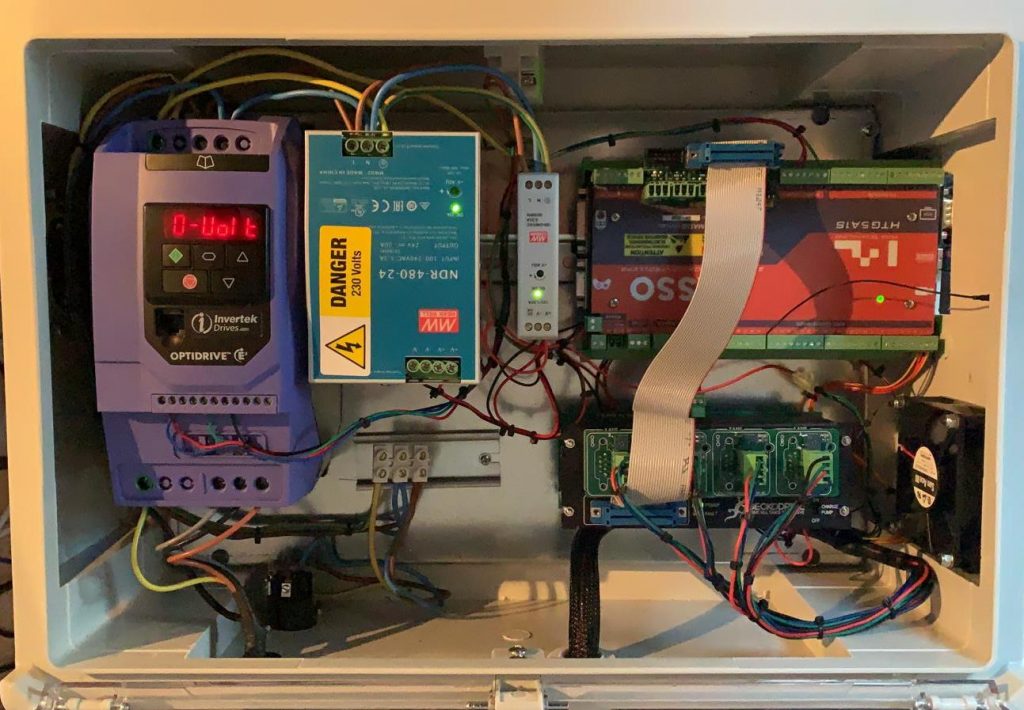
There is no right or wrong way of laying out and wiring the enclosure. See a mock-up photo of a suggested layout below this description. You can lay it out however you prefer however there are some points to note when making these decisions:
- VFD Output, and to some extent AC/DC power supplies & the USB/VGA do not play nice. In placing the AIO/Masso board or any USB/VGA device with its USB connector to the bottom left of the enclosure and the VFD and VFD output cable in as far to the opposing corner as possible we lessen the likelihood of USB disconnections that can be caused by the interaction between USB and the VFD.
- The Fan is blowing into the enclosure beside the motor driver which is the main heat-generating source. This would be the AIO, Gecko or similar. The flow of the fan is towards the sticker so have the sticker pointing in. The fan filter goes on the outside of the enclosure and the fan on the inside.
- Use a hole saw that is as close to the size of the fan blades as possible to drill the fan hole. A hole as little as 10mm diameter less than the fan blades can reduce 50% of the flow.
- The Exhaust filter is placed directly across from the inlet. This could be anywhere but helps to ensure air is travelling directly across the motor drivers. There is enough air exchange in the enclosure that it is not particularly important and does not need to blow over the PSU’s or VFD.
- The exhaust filter is necessary only as when the machine is off there is no positive pressure and so dust from other works in the area can invade.
- If using a USB control system (AIO, GRBL + Gecko) the USB lead can exit the enclosure through one of the medium size glands. You will need to heat shrink or wrap with tape the cable to increase its girth so that the gland will grip it.
- The USB and the VFD cable are the two to keep very separate! So when these two leads exit the enclosure, the VFD cable should head off the machine and the USB lead in the opposite direction and should never cross paths. These Invertek VFD’s are very high quality and don’t generally cause trouble – VFD’s are by nature are noisy though this is the primary consideration for wiring layout.
- Masso units can be oriented with the video port towards the left side of the enclosure so a slot cut in the enclosure can provide access to the USB & Video leads. They can also be mounted outside the enclosure if preferred.
Please contact 3DTek directly when you reach this point if you would like to go over your enclosure setup and plan or send 3DTek a photo of your planned layout for comment.
Sample Layout with considerations from above: (The AIO card below is the USB device, and the heat-generating stepper driver discussed above. This could otherwise be the Gecko Drive & or Masso in your system.)
Sample Layout with considerations from above showing Masso Gecko Configuration.
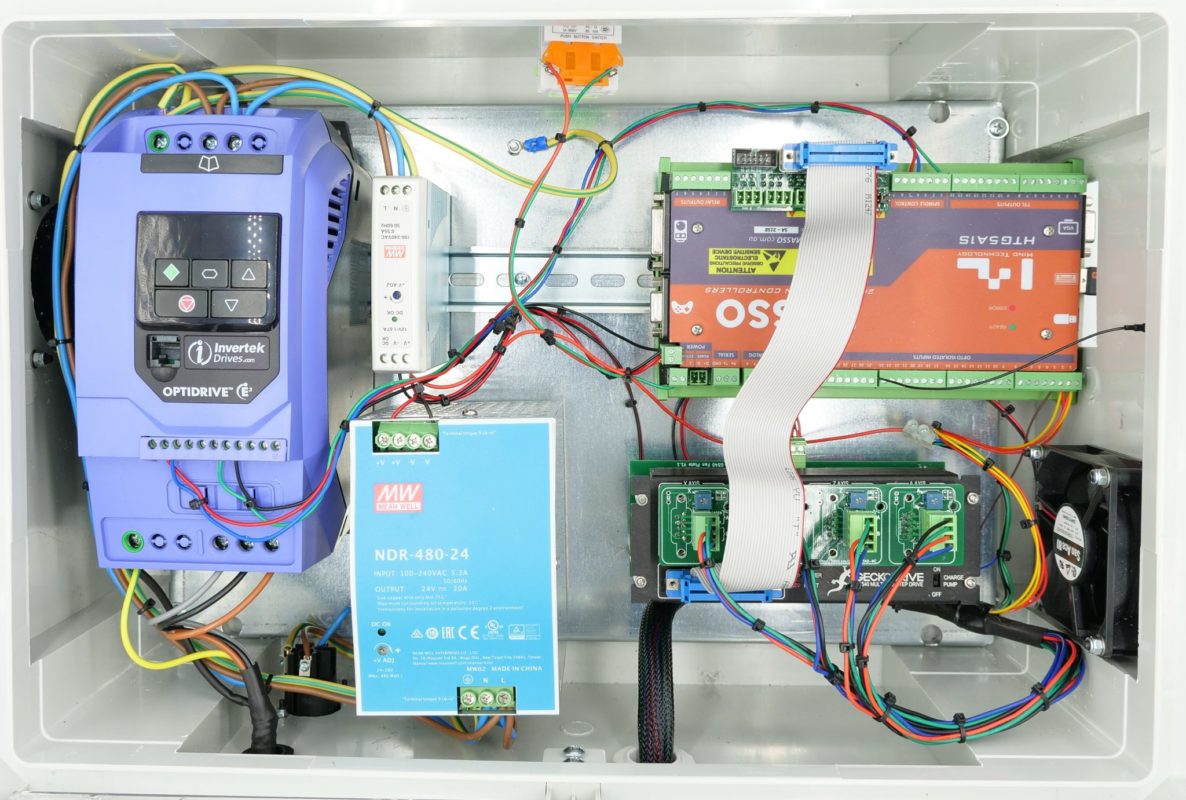
Wiring and Configuration Guides:
Masso Gecko Package
GRBL Gecko G540

